This is a game After Action Report for The Big Push game, interspersed with pictures from my June 2016 trip to the Somme battlefield. I have only played the game once face-to-face, and we may have made some errors. Even so, we had an enjoyable time playing the game. Part of my enjoyment of games about history is understanding the historical events that occurred. Often this is in the naive hope that they do not occur again. I hope you find this article both interesting, and informative.
Click/double click on the small pictures for a larger image.
I have long gazed in interest at the magazine game The Big Push , published by Against The Odds magazine. Many games cover the sector as part of the overall war, but there are no other games that cover the Somme campaign of 1916 at a level of detail. This campaign holds an unusual place in my gamer/historian heart. It has long fascinated me due to the scale of the losses incurred, and the commonly held misconceptions about the campaign. Apart from a few dummy solo plays I had not played the game face-to-face with a real opponent. The solo plays of the game had not enthralled me due to the seemingly overwrought rules.
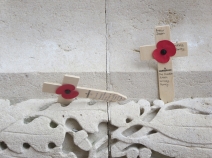
My interest in playing the game was piqued by several events. A Second Edition rule-set was released that promised improvements to the game play. Research into my own family had revealed that my great-grandfather had served on the Somme in 1916. This research had also revealed that he had won a D.C.M. a week before the start of the Big Push of 1st July 1916. The final reason for my wanting to get to grips with the game again was my bucket-list trip to the Somme in June of 2016. It was a moving, and surreal experience, to see the actual battlefields themselves. They are so calm and peaceful now. Gently rolling farmland, well drained due to the underlying chalk, land that seems to be almost randomly dotted with so many well tended cemeteries. So many young men forever in a foreign field. There are still thousands more who have no known grave.
As many gamer will experience, getting an obscure game on the table is not always easy. It does take two to tango. A gamer buddy Ken Tee mentioned he had the second edition game too. Mwwhhaha, I had an opponent. On the 24th of June 2017, with the 101st anniversary of the start of the Battle looming, we gathered at Game Empire, in Pasadena, to play The Big Push.
At my insistence we would play Scenario 1: Over the Top. This scenario covers the pre-game mine detonations and the first 4 weeks of the battle: 4 game turns from 1st July to the 22nd July. Ken would play the dastardly Hun, while I would play the plucky Tommies, and the stalwart Poilus. Tally Ho Chaps.
Mine All Mine
Both Scenario 1, and the Campaign Game, start with a pre-game sequence that represents the extensive, and deadly, underground mine warfare that had been underway since 1915.
In the game terms the British player places 6 randomized Mine counters on the German Start Tench Line. The British player must hope that the mine detonations work well, inflicting damage, disrupting, or suppressing the enemy; but they must plan in case they do not. The pre-game placement of the mines gives the British player a large number of options in where to place these scarce few mines. I chose to scatter them across the British Sector, placing them where it would break up the German defense, or afford me the chance of a breakthrough.
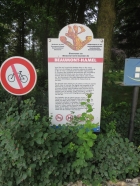
One of the precious mines was placed at the seemingly weakly defend village of Beaumont-Hamel.
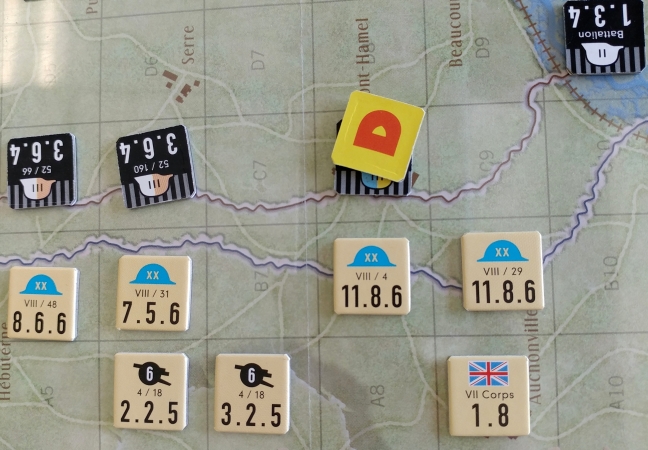
In our game the Hawthorn Ridge mine was a very successful detonation, causing the German 121st regiment of the 26 Reserve Division to be Disrupted. This would greatly aide the British 4th and 29th Divisions in assaulting Beaumont-Hamel.
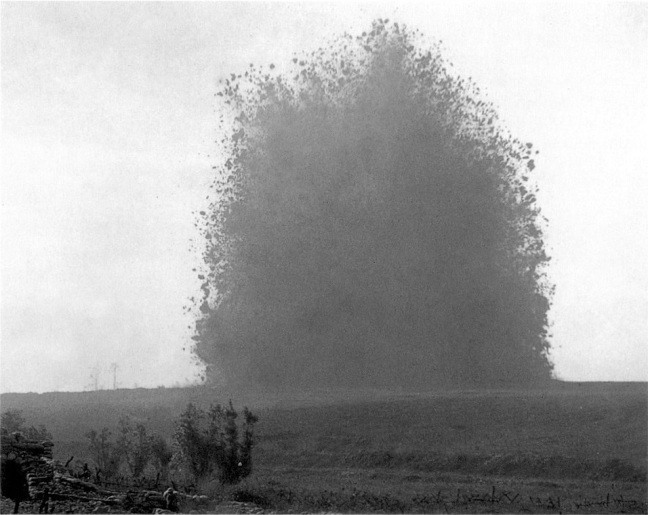
A total of 19 mines were actually detonated on the 1st of July, with mixed results. One of these craters exists to this day, known as the Lochnagar Mine. The land was bought by Brits from a local farmer so it could be preserved as a memorial. The farmer was going to fill in the hole, and return the land to farmland. We should be very glad that the crater was preserved for prosperity as a memorial.
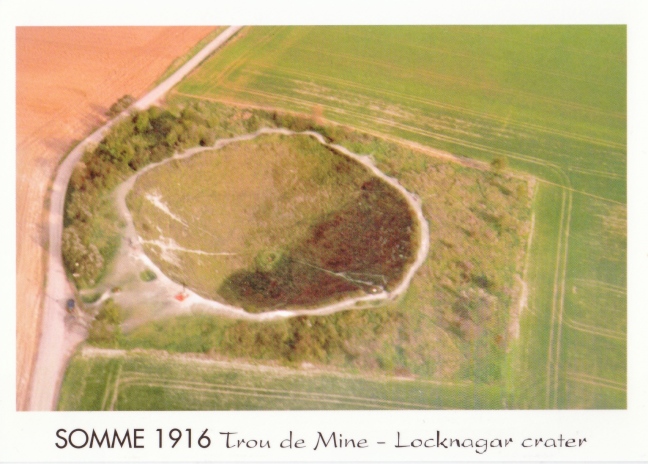
My video of Lochnagar Crater.
Various pictures of Lochnagar Crater, including a large panoramic picture that is my attempt to show the enormity of the crater that still exists to this day.
In stark contrast to the water-filled mine craters that I would later see in Flanders, this crater was well drained by the local geology.
The Perils of Attack
The game situation to the immediate north of Beaumont-Hamel left me with a quandary. Should the the Brits attack on a wide, or a narrow, frontage? This is a typical decision in this game as defense is strong, especially so as the Germans are in entrenched mode in the Start Line trench.
My plan was for the British 4th, and 29th Divisions to both assault Beaumont Hamel. Confidence was high that they could breakthrough and start rolling up the German flank. The British 31st Division would need to engage the German 160th Regiment directly opposite, with the intent to damage, or at least to engage the Germans. The problem is defensive fire. Adjacent Good Order units, Good Order means those are not Disrupted or Suppressed, can fire Defensive Fire. If I did not assault the adjacent good order German 66th Regiment it would enable the two regiments to combine their factors and possibly decimate the assaulting British 31st Division. My only option is to assault the German 66th Regiment with the British 48th Division. As expected, the German player, Ken,
This is where my great grandfather’s unit comes in. Thirty-five year old Corporal T.H. Hilliar D.C.M. was in the 1/6th Battalion of the Gloucestershire Regiment. His battalion was part of the 144th Brigade of the 48th (South Midland) Division, a Territorial Force unit.. Luckily, most of this division were in reserve on the actual day. The two battalions of the Warwickshire Regiment that were attached to the 4th Division were hit hard on July the 1st, while attacking the the Quadrilateral (Heidenkopf).
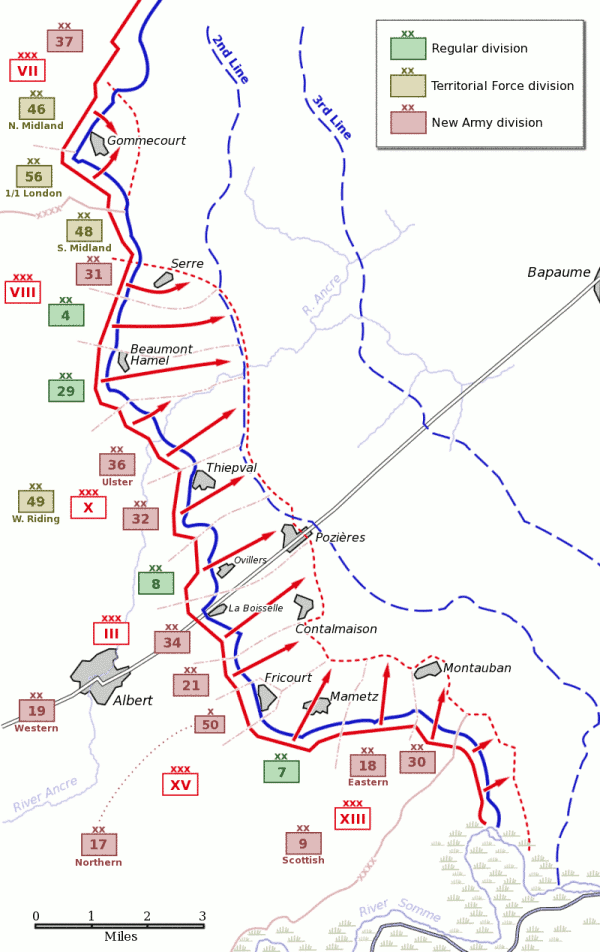
In our game, the fortunes of war were very different for the British 48th and 31st Divisions. Although they went over the top side-by-side, the 31st Division would successfully assault and take a step loss, destroying the opposing Regiment in a counterattack. The assault by the 48th Division would fail miserably, and take 3 step loses without inflicting any (noticeable) damage on the defenders.
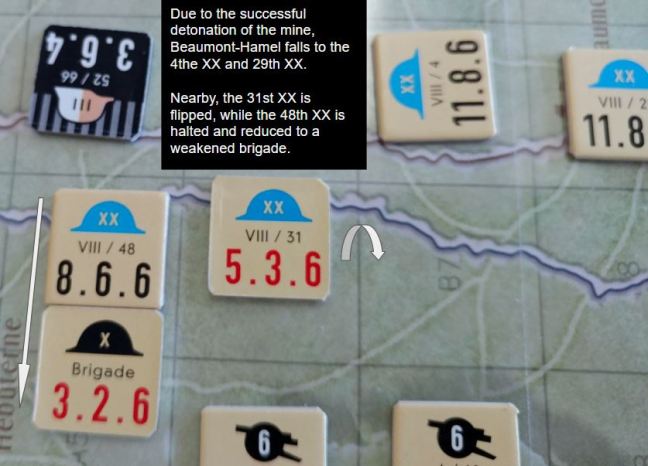
The in-game attack on Beaumont-Hamel, preceded by the successful mine detonation, was in stark contrast to the actual events of the 1st of July 1916. Barely a mile from the present day village of Beaumont-Hamel is the Beaumont-Hamel Newfoundland Memorial. Part of the British 29th Division, the Newfoundland Regiment went over the top with 780 men, only about 68 reported for roll call the next day. The first day of July is still commemorated as Memorial Day in Newfoundland.
Beaumont-Hamel would not fall until mid-November 1916.
The Northern Sector
The lack of British forces in the northern sector, near Gommecourt, meant that I was not willing to risk an attack in that peripheral sector. A failed British assault might leave the area open to a swift German counterattack, Ken is no fool, and would certainly take advantage with a well placed counterattack. As the British player, I was content to leave the Gommecourt sector for a later game turn.
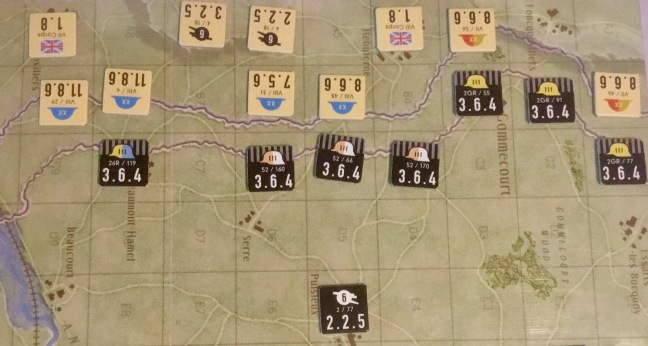
End Of The 1st Game Turn.
The first turn of the game was a mixed bag for both sides. There were many units, from both sides, in the Replacements Box. Overall the casualties were slightly in favor of the British. Both sides would need to rebuild units, and to relocate units to rebuild their lines.
For me the unexpected highlight was that a British Brigade was in Pozières, in the center of a long swath of Start Line that was free of German units. It my not have been the Big Push, it was more of a Large Shove.
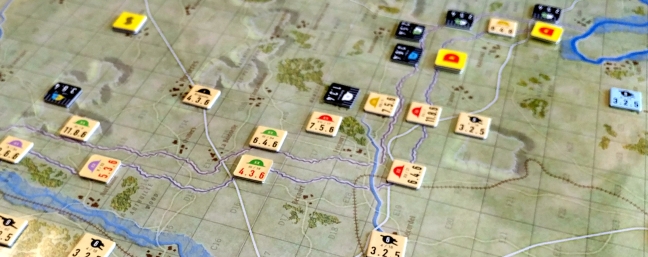
Once you see the reinforcement schedule it is obvious that the Germans quickly rushed in extra units to plug the gaps, and to build a new line. This is WW1, where infantry, artillery, and especially supply can only move so fast in attack. There may have looked like a large hole in the front line, but Ken quickly plugged the gap with his German reinforcements.
The French 6th Army Sector
The French involvement in the 1st Battle of the Somme is much overlooked, especially by the British. The ongoing Battle of Verdun had weakened the French, causing the British to take a much larger part in the Somme Offensive than was originally planned. Even so, the French contribution was important. Such as it is in this game. The French have proportionally more heavy artillery, and strong Divisions.
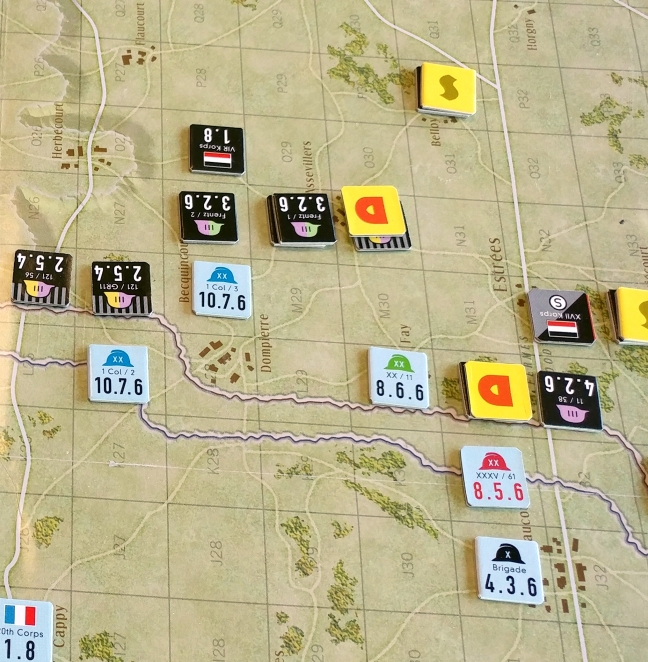
After doing well in the British Sector, my success was not repeated south of the River Somme. This was where I mishandled the strong, yet less numerous French Divisions. It is hard to hold the line, and to attack if you do not have amble reserves. The French were advancing yet they were stretched too thin. It was hard to mass units when you had to defend the flank from counterattacks from the pesky Hun, aka Ken. This would force me to relocate one French Division from the north, to the sector south of the River Somme.
The Game Continues
After a game turn we settled into a good rhythm. The game system began to stick in our minds. Command ranges, movement costs, and leapfrogging Headquarters units to provide maximum coverage, became second nature. The game was flowing well, and we were enjoying the contest. Ken was wise enough to locate his forces so that I had to fight for the better ground. He would counterattack if there was an advantage. This would disrupt my attacking rhythm, forcing me to react. Ken traded ground for time. Time was on his side, and so were the Victory Conditions. In a short scenario you need to keep a wary eye on the prize. I had to clear the Start Trench of all German units AND to control a number of several specific places on the map.
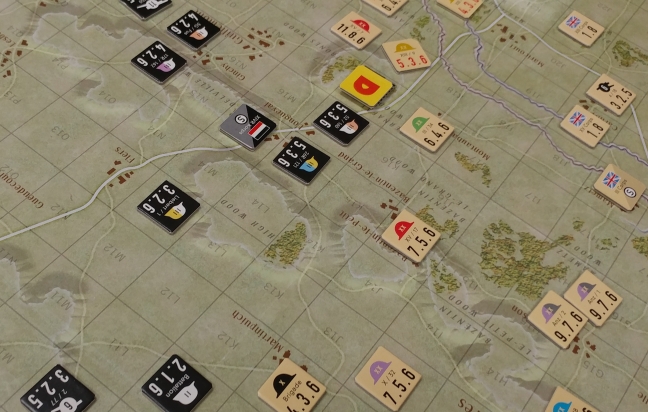
As we started the game turn 4, the final game turn, it was obvious that I would have a hard time winning. This was despite the major gains that I had made. Ken still held the Start Line trench is two areas. Areas that were hard for me to mass my attackers. Pesky Huns!
They Did Indeed Pass
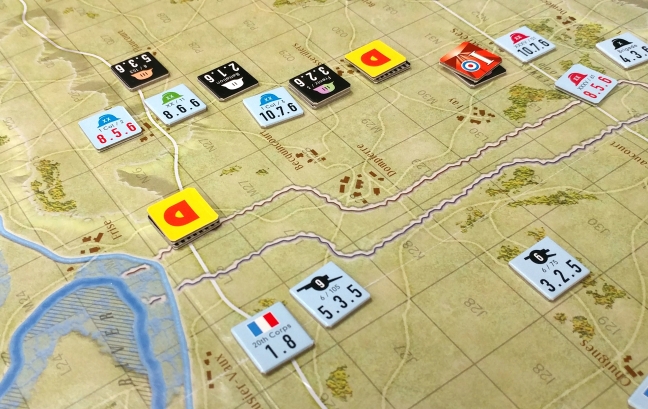
After a slow start, south of the River Somme, the French continued to attack. The heavy artillery was a big help, allowing them to overwhelm the Germans with mass barrages. By switching direction the French managed to clear most of the Start Line and gain the village of Estrees. On turn 4 the French unleashed a last ditch attack on their objective, the village of Herbecourt. Using all the tactical tools they had; gas, creeping barrages, and lifting barrages, the French broke through to take the village. Alas it was all in vain as the French sector was thinly held and the Germans units could easily reoccupy their original trenches to deny the Allied victory. Hind sight is a wonderful thing, I would wish that I had sent the last French Division south.
To be fair, the German Victory was earned in both the British and the French sectors. I may have cleared the German units from the vast majority of the Start Line, and taken enough objectives but I ran out of time. Ken won as he held enough places where I could not dislodge him, and he had enough units to exploit the small gap in my French lines.
We enjoyed the game. It was a challenging game, and I want to play it again. The campaign game is especially intriguing with the inclusion of what-if options for both players. The longer campaign game will give both players the opportunity to attack, and to defend.
Lessons were learned, and a fun time was had. Well done Ken, thanks for playing.
Optional rules:
The next time we play I would seriously consider using the optional Assault Commitment rule. This especially hampers the British, while raising the tension in the game. No unit is guaranteed to assault. I think this suits the many unknowns of combat in the Great War. Lack of experience, communications problems, enemy barrage, there are so many reason why things did not happen as per the plan.
8.7.1 Optional Rule: Treat any Assault DR of 6 for the above test as a failed DR (no automatic passes). Developer’s Note: Highly recommended as a pro-German play balance device.
Here are a few of the many pictures from my trip to the Somme in June 1916.
Thiepval Anglo-French Cemetery & Thiepval Memorial
“That the world may remember the common sacrifice of two and a half million dead, here have been laid side by side Soldiers of France and of the British Empire in eternal comradeship.”
Thiepval Anglo-French Cemetery Cross of Sacrifice inscription
To the west of the large Thiepval Memorial, as the land begins to slope down towards the Ancre Valley, lies the Thiepval Anglo-French Cemetery. Here lay 300 from France, and 300 from the British Empire. The majority of those who lay there are unidentified. “Inconnu” (in French) on the stone crosses, “Known Unto God” on the Commonwealth headstones.
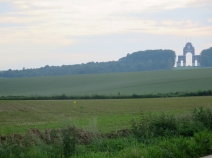
The full title is the Thiepval Memorial to the Missing of the Somme. This betrays the purpose in that is it solely for those fallen who could not be found, or those who could not be identified from both the 1st Battle of the Somme in 1916, and the 2nd Battle of the Somme in 1918. The memorial commemorates over 72,000 British and South African dead. Although that number is staggering, it does not include all of the British Empire missing from the Somme battles. In the words of the CWGC “The dead of other Commonwealth countries, who died on the Somme and have no known graves, are commemorated on national memorials elsewhere.”
Much is said about the tactics of the First World War. The defender held the advantage, that is for sure. Here are some pictures that help to illustrate the topography of the Somme region. The land is open, and clear of obstacles such as hedgerows or walls. You can often see for miles. The Germans held what little high ground there was, and they had artillery and machine guns.
Reflection
It is hard for me, at times, to reconcile my interest in history, with my enjoyment of games about history. Despite knowing about the horrors of war, the pain and suffering that war inflicts, I still like games about war. The games help me to understand the issues, and the reasoning behind historical events. The games spur me into reading more books, and watching more documentaries.
War is a necessity at times. War is hell, we should not forget that.
Tim
1st July 2017.
Edited 17th July 2017
Links
Commonwealth War Graves Commission, abbreviated to CWGC (link) the organization responsible for the commemoration of 1.7 million British and Commonwealth people, in cemeteries and memorials at 23,000 locations in 154 countries.
The Somme 100 Commemorations (link).
Thiepval Memorial, the full title is the Thiepval Memorial to the Missing of the Somme
Wikipedia (link).
Thiepval Anglo-French Cemetery (CWGC link)
Thiepval Museum (link)


